Automate the visualization of your GitHub projects in your portfolio.
Get to know the github-automated-repos library


Github-automated-repos is the lib that gives you the power to manage the visualization of your projects on the website,
in your own GitHub in one place!
Getting Start
Use the code example in this documentation. Code Example
1. Installation
npm install github-automated-repos
    # or
yarn add github-automated-repos
2. hook config.
import {useGitHubAutomatedRepos} from "github-automated-repos";

const data = useGitHubAutomatedRepos("GitHubUsername", "KeyWord");
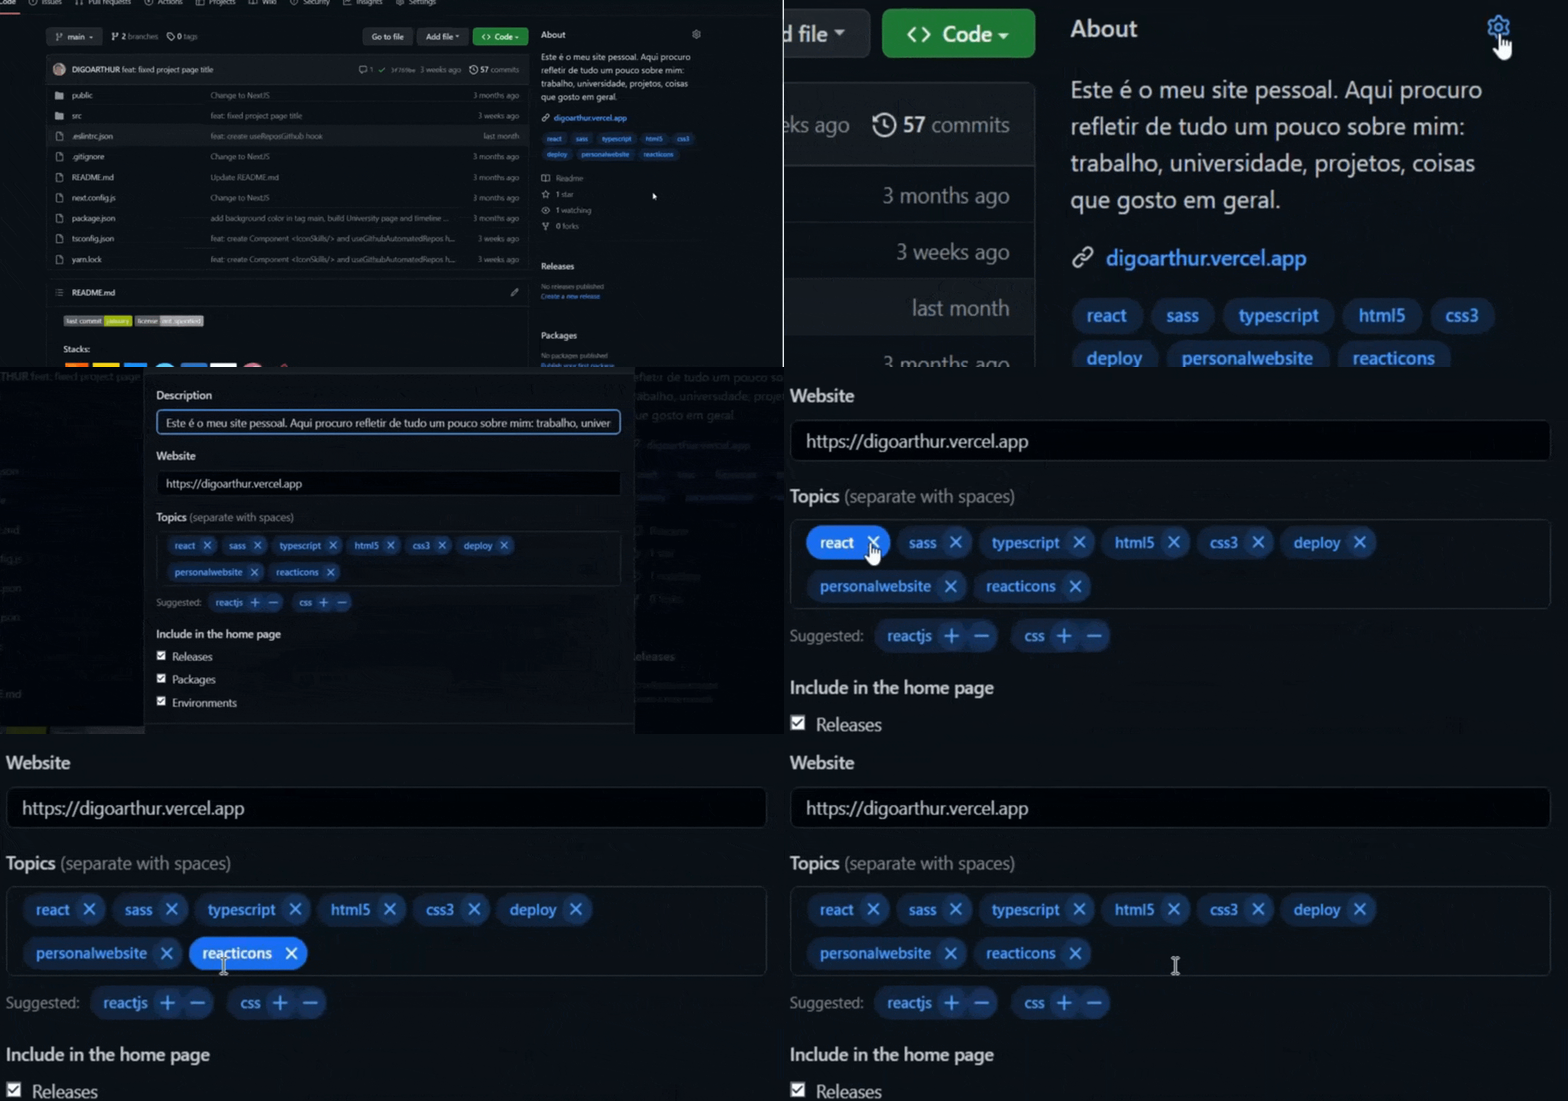
3. Choose the repositories and fill in the Topics field with the keyword you determined.
To insert stack names in the topics field, see web documentation > Stack Icons
4. ✅Ready! JSON — Data from repositories chosen by you!
Ex.:
JSON — DATA
Data Example ~ console.log(data) ~
Array(4)
0
:
{id: 517152367, name: 'Dashgo', html_url: 'https://github.com/DIGOARTHUR/Dashgo', description: 'IGNITE - Trilha ReactJS/ - Neste projeto é aplicad…ate, Components, Props. Recursos do JS como: Map.', topics: Array(7), …}
1
:
{id: 482667387, name: 'DashBoard-Financeiro', html_url: 'https://github.com/DIGOARTHUR/DashBoard-Financeiro', description: 'IGNITE - Trilha ReactJS/ Chapter II - Esta aplicaç…mpanhamento de valores de entrada, saída e total.', topics: Array(6), …}
2
:
{id: 412849316, name: 'Task.TODO', html_url: 'https://github.com/DIGOARTHUR/Task.TODO', description: 'IGNITE - Trilha ReactJS/ - Este projeto aborda con…Filter e Math, Spread. E para estilização o SASS.', topics: Array(7), …}
3
:
{id: 355616217, name: 'Move.it', html_url: 'https://github.com/DIGOARTHUR/Move.it', description: 'NLW#04 - Rocketseat - Utilizando a técnica Pomodor… o objetivo é executar a tarefa do seu interesse.', topics: Array(8), …}
length
:
4
[[Prototype]]
:
Array(0)
IN PAGE WEB

About Library
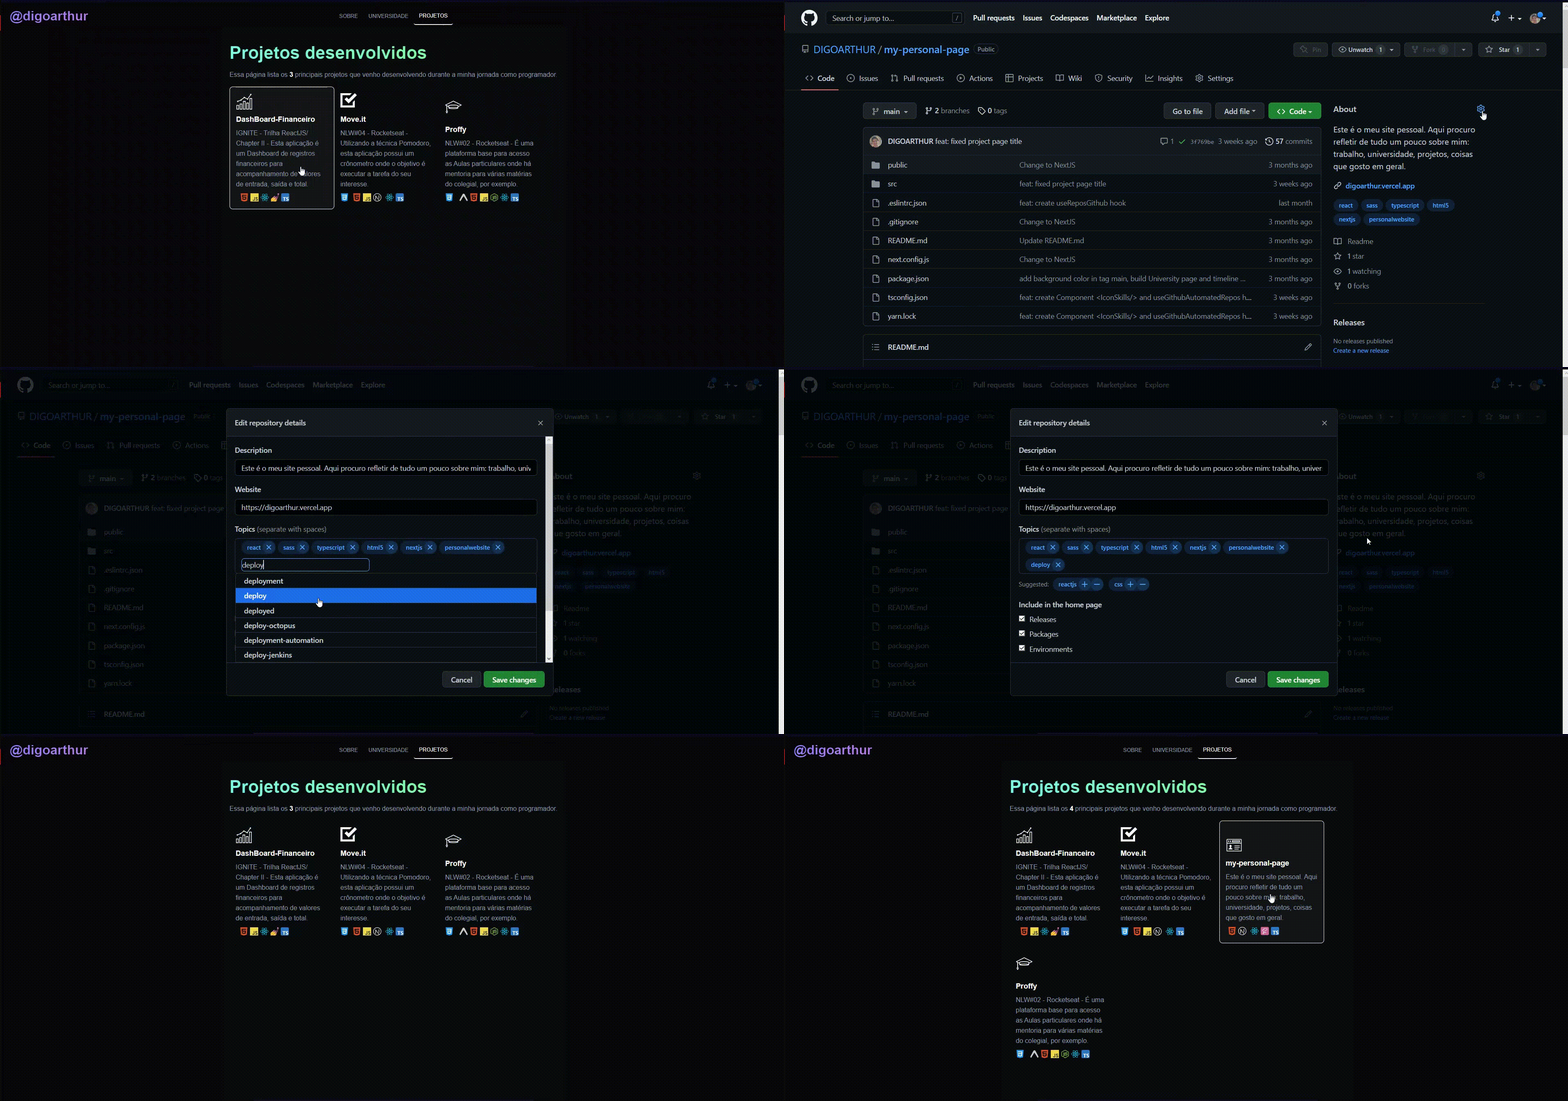
This library automates the view your GitHub projects on your website in one place. But how? Make the code configuration only once in your application with github-automated-repos, and manage the view of your projects on GitHub in the Topics field. Choose which project will be seen on your website, and you can even customize your project card, for example, with a representative icon and show which stacks were used. All in one place!

Import, Hook and Components
Import
import { useGitHubAutomatedRepos, ProjectIcons, StackIcons, StackLabels } from 'github-automated-repos';The package imports four elements:
useGitHubAutomatedReposhook responsible for automating the repositories. It returns a function called dataGithubRepos, which takes two parameters: data (data that comes from the GitHub API) and the keyword (the latter responsible for showing the project on your website from the moment it is declared in the Topics field of the your Github repository). The dataGithubRepos returns, so optimized, an array of objects containing 7properties: banner, id, html_url, homepage, topics, name and description.
const data = useGitHubAutomatedRepos("GitHubUsername", "KeyWord");- return data example:
{
    banner:"https://raw.githubusercontent.com/DIGOARTHUR/github-automated-repos/main/src/assets/images/banner.png"
    description: "The library that automates, in one place, the administration of your github projects on your website."
    homepage: "https://github-automated-repos.vercel.app"
    html_url: "https://github.com/DIGOARTHUR/github-automated-repos"
    id: 585693873
    name: "github-automated-repos"
    topics: (8) ['automated', 'deploy', 'github', 'library', '
}JStackIconsThe component returns, based on the iteration of the topic array that is contained in data, icons of the stacks used in your project. Enter the stacks used in your repository's topic field.. Check the Stack Icons tab!
data.map((item) => {
     return (
    ...
    {item.topics.map((icon, index) => {
         return (
           <StackIcons key={index} itemTopics={ icon} className={ } />
    }
...- render component StackIcons example:

StackLabelscomponent returns, based on the iteration of the topics array that is contained in data, labels of the stacks used in your project. Insert the stacks used in the topics field of your repository. Check the Stack Icons tab!
data.map((item) => {
     return (
    ...
    {item.topics.map((icon, index) => {
         return (
           <StackLabes key={ index } itemTopics={ icon} className={ } />
    }
...- render component StackLabels example:

ProjectIconscomponent returns, based on the iteration of the topics array that is contained in data, icons to represent your project. The project tag must be inserted in the topics field of your repository. Check the Project Icons tab!
data.map((item) => {
     return (
    ...
    {item.topics.map((icon, index) => {
         return (
           <ProjectIcons key={ index } itemTopics={ icon } className={ } />
    }
...- render component ProjectIcons example:

Fill in the fields in the github repository
banner: This property returns a .PNG image. For this to be possible, the correct name must be entered in the file calledbanner.pngand also the path. Ex.:
└── src
    └── assets
            └── imgs
                └── `banner.png`
    ├── ...
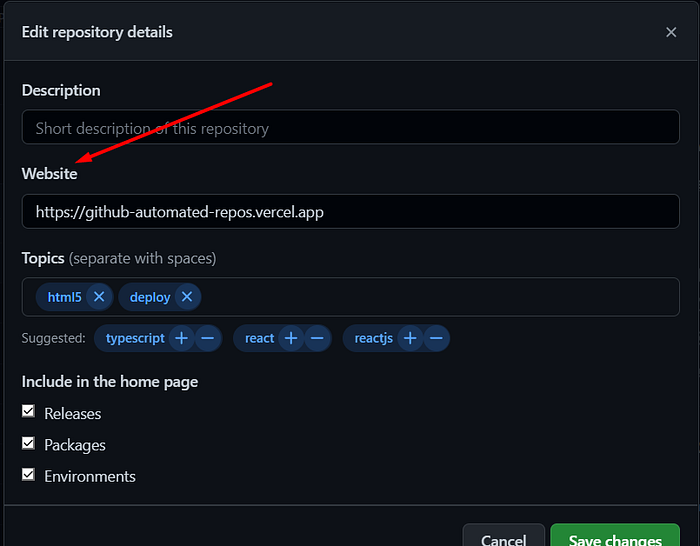
id: repository identification number. used as parameter in the key tag. This field does not need to be filled in.html_url: repository link. Used as the link of access. This field does not need to be filled in.homepage: it's the access link to the built page, page deploy. About / Website of your GitHub.
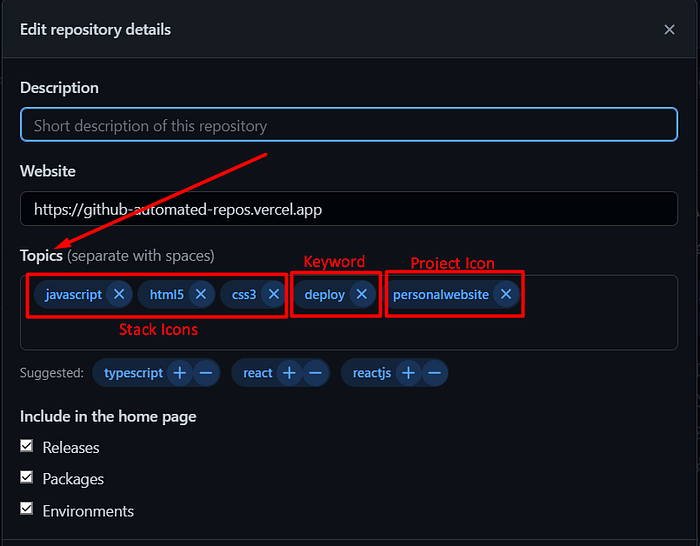
topics: array that brings information about the icons in Project Icons and Stack Icons. Used in both ProjectIcon and StackIcon components. It is in this field that is passed the key configured in the hook. Refers to the field About / Topics of your GitHub.
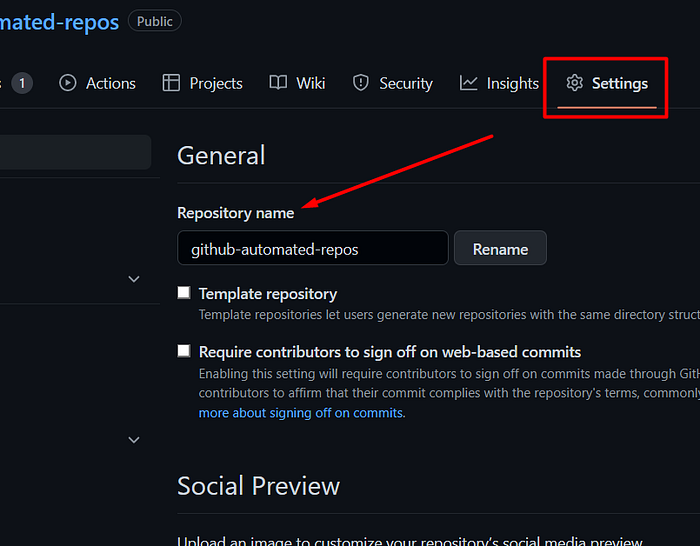
name: This is the name of the repository. Refers to the field Settings / General / Repository name of your GitHub.
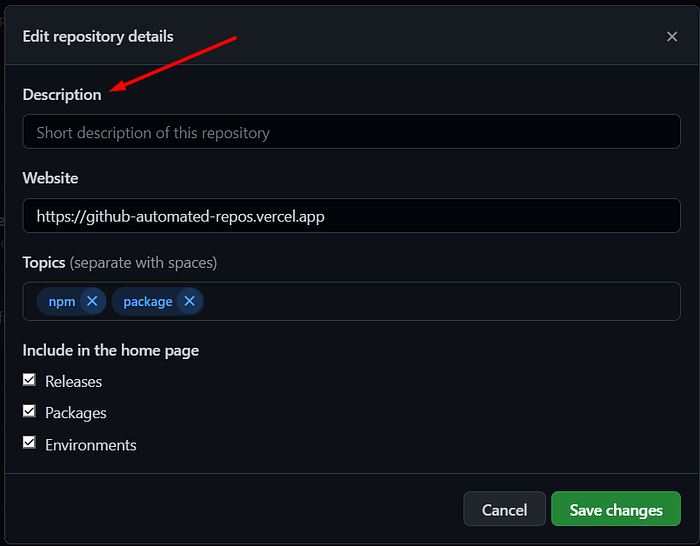
description: This is the description given to your repository. Refers to the About /Description field of your GitHub.
Code Example
❗❗ Don’t forget to fill in the fields: your GitHubUsername and keyWord (determined by you).
const data = useGitHubAutomatedRepos("GitHubUsername", "KeyWord");Javascript / Typescript
import './App.css';
  import { useGitHubAutomatedRepos, ProjectIcons, StackIcons, StackLabels, } from 'github-automated-repos';
  function App() {
                              {/*useGitHubAutomatedRepos hook*/ }
  const data = useGitHubAutomatedRepos("GitHubUsername", "KeyWord");

    return (
      <div className="App">
        {
          data.map((item) => {
            return (
              <div key={item.id}>

                {/*Banner / Layout / Logo*/}
                <img src={item.banner}></img>

                {/*Project Icons*/}
                {item.topics.map((icon) => {
                  return (
                    <ProjectIcons key={icon} className="project_Icon" iconItem={icon} />
                  )
                })}

                {/*html Url*/}
                <a href={item.html_url}>
                    {/*Name Project*/}
                    <h1>{item.name}</h1>
                </a>

                {/*Description*/}
                <p>{item.description}</p>

                {/*Homepage*/}
                <a href={item.homepage}>
                    <h3>Homepage</h3>
                </a>

                {/*Stacks Icon and Stacks Label*/}
                {item.topics.map((icon, index) => {
                  return (
                     <div key={icon} style={{display:'flex', justifyContent:'center'}}>
                        <StackIcons key={icon} className="stack_Icon" itemTopics={icon} />
                        <StackLabels key={index} itemTopics={icon} /
                      </div>
                  )
                })}

              </div>

            )
          })
        }
      </div>
    );

  }
  export default App;
Framework Settings.
NextJS
└── My-app
    ├── ...
    ├── next.config.js
    ├── ...
/** @type {import('next').NextConfig} */
const nextConfig = {
reactStrictMode: true,
transpilePackages: ['github-automated-repos'],
}
module.exports = nextConfig
